Newsletter Campaigns
Getting Started with Agile CRM
Getting Started with Agile CRM
Email newsletters are an effective way to nurture new leads and engage current customers. It’s easy to create and send newsletters with Agile CRM. We provide a wide variety of free HTML templates and you can also upload your own HTML code.
You can send HTML emails, plain-text emails, or both. However, please note that we are only able to track email opens and link clicks for HTML emails.
To create a Newsletter Campaign, go to Campaigns > + Add Campaign.
Click on Go underneath the Newsletter description on the General tab.
(Or if you’d like to create a newsletter campaign from scratch, go to Campaigns > Custom, then drag-and-drop a Send Email Node below the Start Node and connect the nodes. You will end up with the same campaign workflow as above.)
Double-click on the Send Email Node to create your email newsletter.
On the Info tab, enter basic information such as From (Name), From (Email) and Subject.
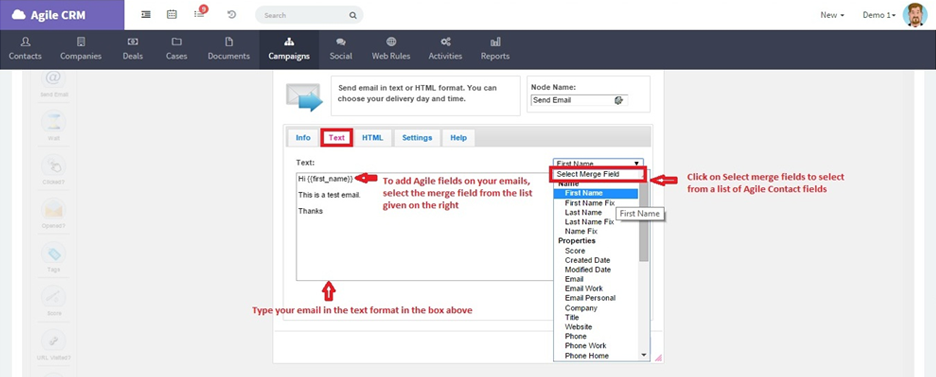
On the Text tab, you can enter and edit a text version of your email newsletter. To include merge fields, such as the first name of each email recipient, just select the correct Merge Field from the Select Merge Field drop-down menu.
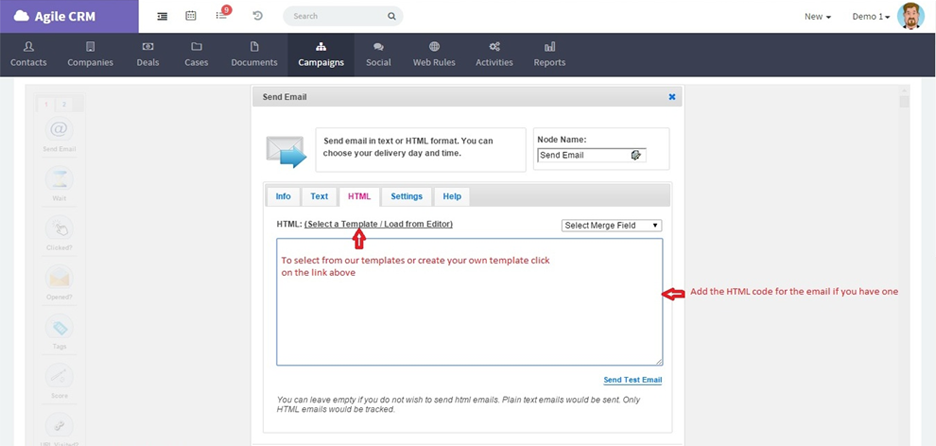
On the HTML tab, you can paste your own HTML code or select a template.
Click on Select a Template / Load from Editor to choose one of Agile CRM’s pre-designed templates or a custom template which you’ve created and saved previously in Agile.
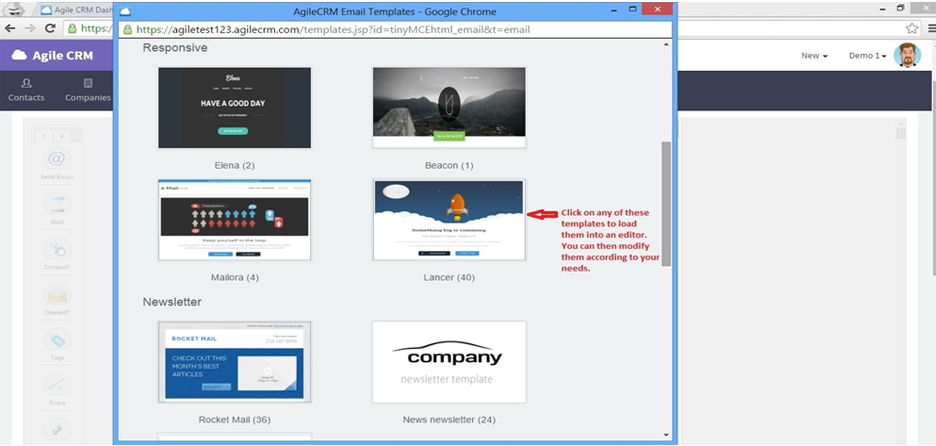
To select an email template, click on the template image. You will then see a preview of the template.
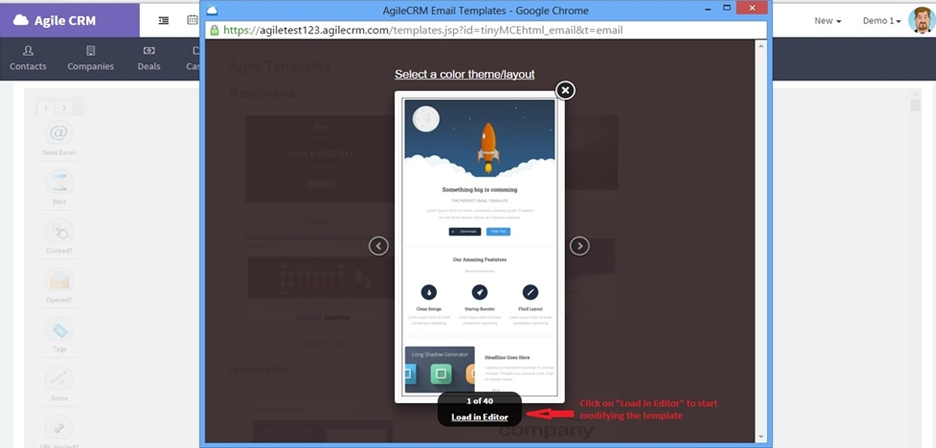
If you like the template and want to use it for your newsletter, click on Load in Editor.
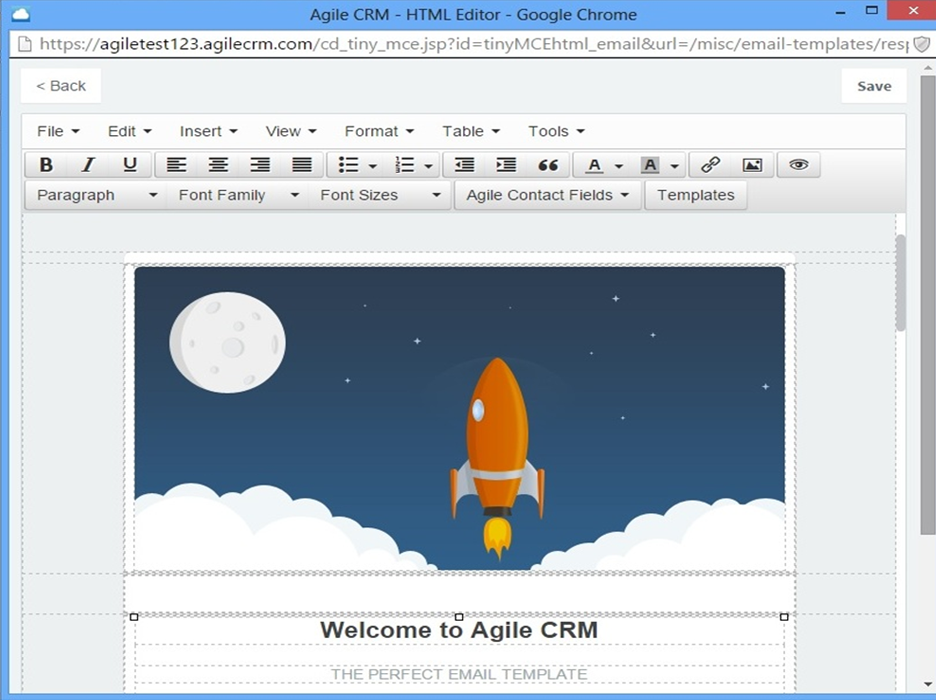
You can now compose your email using the template. Add your own text, formatting and images. To add Merge Fields, just select the desired field from the Agile Contact Fields drop-down menu.
Click Save to save your email newsletter and go back to the Newsletter Campaign workflow.
You can also create your own email template for one-time use or use in multiple campaigns.
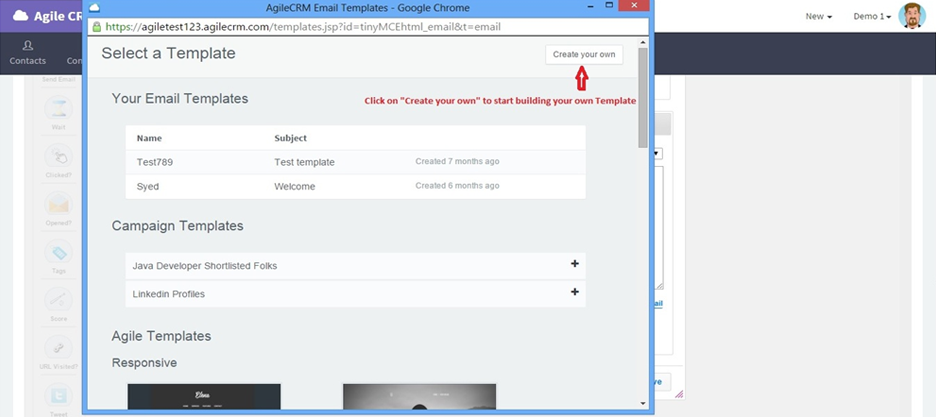
On the Select a Template page, click on Create Your Own.

You can now compose an email that will be used in your Newsletter Campaign. The HTML Editor lets you add images and links, modify fonts, etc. Note that you can also enter a plain text email and have it sent in the HTML format.
When your email/template is ready, click on Save to save the template and return to the Newsletter Campaign workflow.
Once you have saved your email newsletter, connect the Start Node to the Send Email Node. Your basic email newsletter campaign is ready for contacts. The next step is to add contacts to the campaign.