Setting Up Deals
Getting Started with Agile CRM
Getting Started with Agile CRM
Deals are sales opportunities that can be continuously tracked in Agile CRM. Deals are completely customizable, including Deal Tracks and Deal Milestones, and they can be added either manually or automatically as a part of sales and marketing campaigns (more on that later).
When you add a Deal in Agile CRM, we create a custom page for that Deal with Deal Activities (timeline), Notes, Documents, Related Contacts, Tasks, and Events.
Let's start by looking at Deal Tracks and Deal Milestones, then we'll learn how to add new Deals manually and import Deals from a CSV file.
Regular/Enterprise users can create Deal Tracks for different products, services or sales pipelines. For example, if your company uses one sales process for selling directly to consumers and another sales process for selling to resellers, you might create one track called "Public" and one track called "Resellers".
It's easy to create Deal Tracks in Agile CRM:
Login to your Agile Dashboard.
Go to Admin Settings > Deals.
Click on + Add Track.
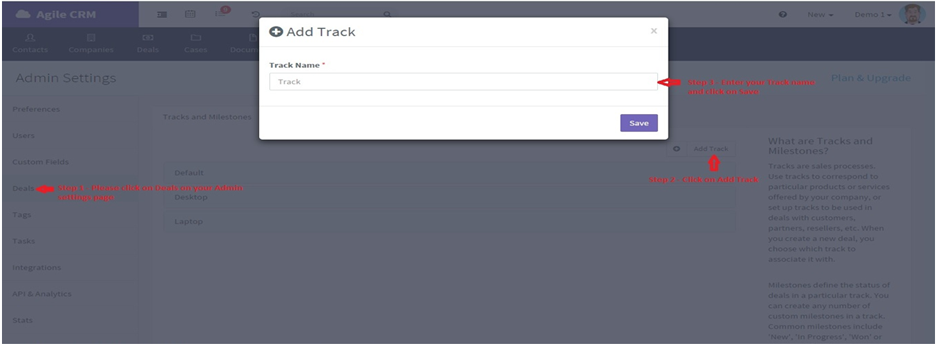
Name your new Deal Track and click on Save.
Your new Deal Track is now live in Agile CRM. Access it from Admin Settings > Deals > Tracks and Milestones or the main Deals page under the Tracks drop-down menu.
Every Deal Track has its own set of Deal Milestones to represent the stages that a deal moves through on that track. By default, we include the following Deal Milestones: New, Prospect, Proposal, Won, and Lost. You can create or modify Deal Milestones to fit your SMB's Sales Pipeline:
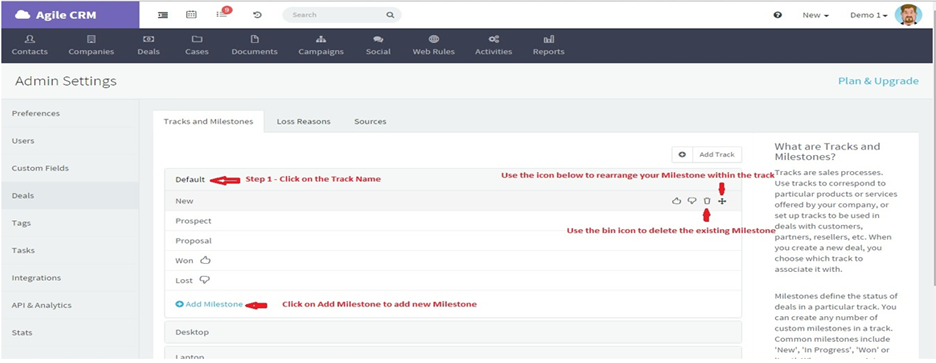
Go to Admin Settings > Deals.
Click on a Deal Track to see its current set of Deal Milestones.
To add a new Milestone, click on + Add Milestone, name the new Milestone, and click Add.
To delete a Milestone, click on the trash bin icon.
To rearrange the order of Deal Milestones, just drag-and-drop them using the drag icon.
Deals can be added manually, imported from a CSV file, or added automatically using Campaign Nodes.
To add a Deal manually, open the main Deals page in your Agile CRM account and click on + Add Deal.
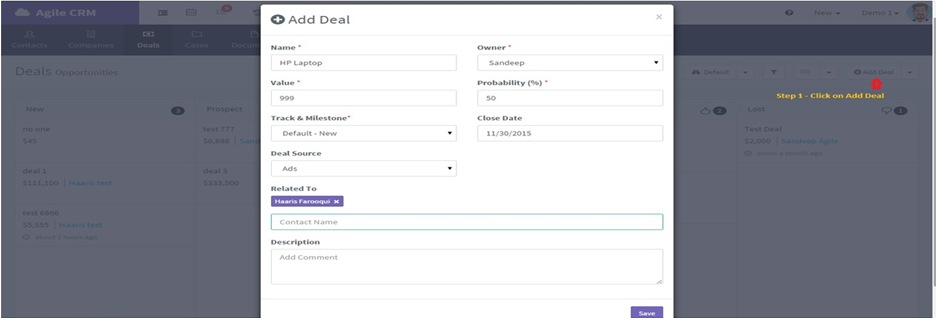
You will now see an Add Deal popup where you can enter information about your new Deal.
Required fields are Name (unique to this deal), Owner (Agile CRM user to whom you want to assign the deal), Value (monetary value of the deal), Probability (estimated likelihood of closing the deal), Track and Milestone (see above).
To associate a Contact with the Deal, start typing the Contact's name in the Related field, then select the Contact.
When you are finished entering information, click Save and your new Deal will now be active in your Agile CRM account.
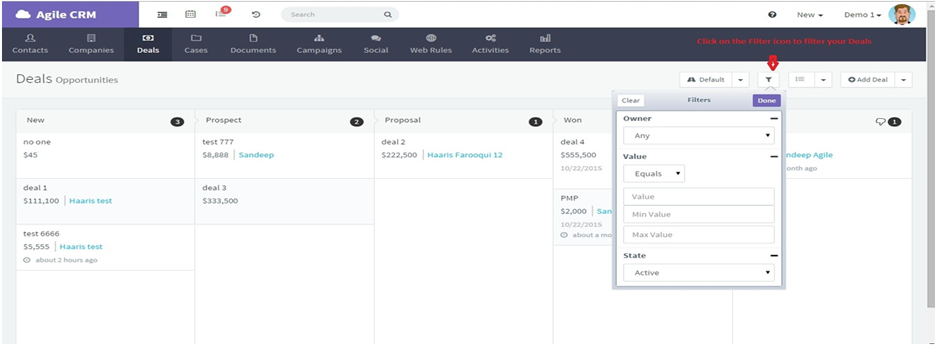
Deal Filters are available from the filter icon on the upper right. Filters make it easy to find Deals based on Owner, Value, Status and more.
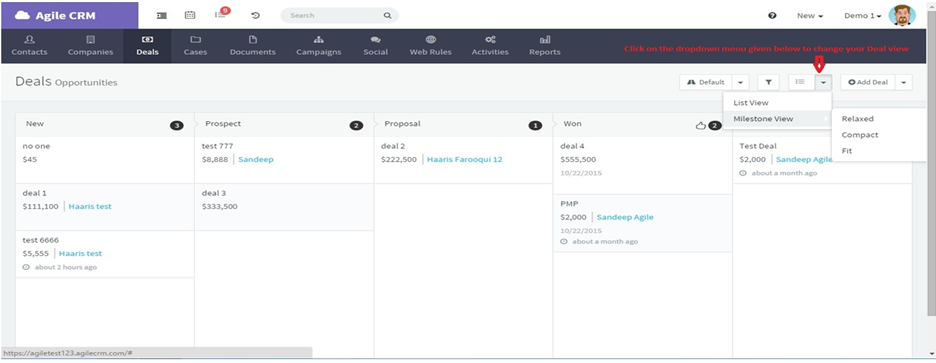
Use the View drop-down menu to switch between a List View and a Milestone View of your Deals.
If you have a CSV file of Deals that you may have exported from another CRM, you can quickly import data from this CSV field into Agile CRM. To import Deals data from a CSV file:
Open the main Deals page in your Agile CRM account.
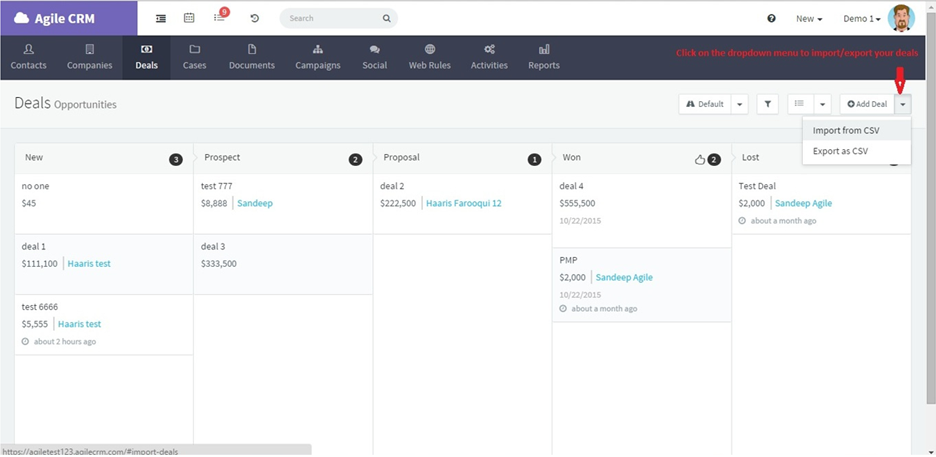
Click on the arrow icon next to + Add Deal to open the CSV drop-down menu.
Click on Import from CSV.
Upload the CSV file containing the Deals you want to import.
Agile accepts up to 10,000 Deals in one upload.
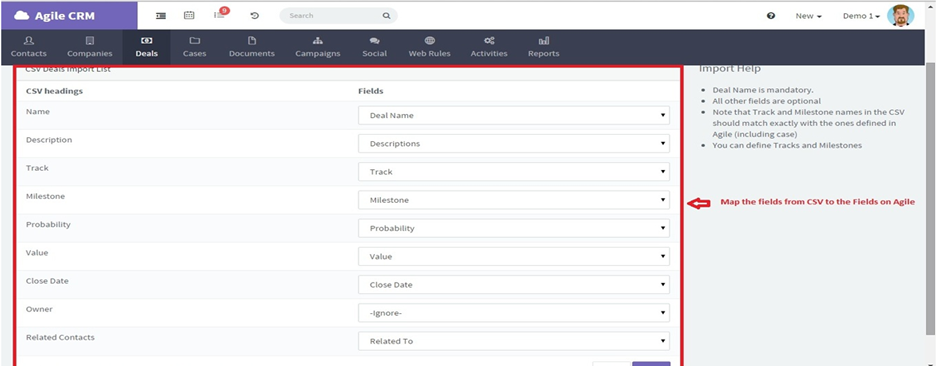
Map the fields from your CSV file to Agile CRM. Note that Deal Name is mandatory but all other fields are optional.
When you are finished mapping fields, click on Import to complete the importing process.